Difference between revisions of "Debian LDAP Server Installation"
From Supercomputación y Cálculo Científico UIS
| (11 intermediate revisions by 2 users not shown) | |||
| Line 1: | Line 1: | ||
| − | = Debian LDAP Server Installation = | + | __NOTOC__ |
| + | |||
| + | <div class="thumbnail img-thumbnail">http://wiki.sc3.uis.edu.co/images/a/a8/Logo_sc33.png</div> | ||
| + | <p><div class="btn btn-primary"><i class="fa fa-long-arrow-left"></i> [[LDAP]]</div></p> | ||
| + | |||
| + | <div class="col-md-14"> | ||
| + | <div class="panel panel-darker-white-border"> | ||
| + | <div class="panel-heading"> | ||
| + | <h3 class="panel-title">Debian LDAP Server Installation</h3> | ||
| + | </div> | ||
| + | <div class="panel-body"> | ||
| + | <p> | ||
1) Install the following packages | 1) Install the following packages | ||
| − | + | {{Command|apt-get install slapd ldap-utils}} | |
| Line 14: | Line 25: | ||
<center> | <center> | ||
[[Image:Ldapserver1.png| 600 px]] | [[Image:Ldapserver1.png| 600 px]] | ||
| + | </center> | ||
| + | |||
| + | <center> | ||
| + | [[Image:Ldapserver2.png| 600 px]] | ||
</center> | </center> | ||
| − | + | {{Note| A new LDAP object is created (admin). The DN of this object is composed by its name (admin) plus the DNS domain of the LDAP server.}} | |
| + | |||
| + | 3) You can test the server executing the following command: | ||
| + | |||
| + | {{Command|slapcat}} | ||
| − | + | == Adding a New Directory Branch == | |
| − | + | 1) Edit a file named base.ldif and add the following lines: | |
| − | + | {{File|base.ldif|<pre><nowiki> | |
| − | + | # create new | |
| + | # change to your own suffix for the field 'dc=server,dc=world' | ||
| + | dn: ou=people,dc=uis,dc=edu,dc=co | ||
| + | objectClass: organizationalUnit | ||
| + | ou: people | ||
| − | + | dn: ou=groups,dc=uis,dc=edu,dc=co | |
| − | + | objectClass: organizationalUnit | |
| − | + | ou: groups | |
| − | + | </nowiki></pre>}} | |
| − | |||
| − | + | 2) Add the objects using the following command: | |
| − | |||
| − | |||
| − | + | {{Command|<nowiki>ldapadd -x -D cn=admin,dc=uis,dc=edu,dc=co -W -f base.ldif</nowiki>}} | |
| − | + | </p> | |
| + | </div> | ||
| + | </div> | ||
| + | </div> | ||
Latest revision as of 21:03, 9 April 2015

Debian LDAP Server Installation
1) Install the following packages
apt-get install slapd ldap-utils
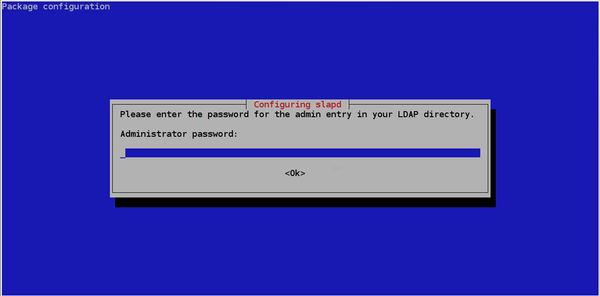
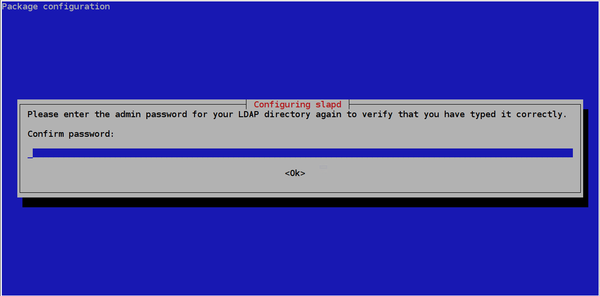
2) Configure LDAP. Debian installation scripts show a window where you can configure some parameters
Set the LDAP administrator password
Retype the password
NOTE: A new LDAP object is created (admin). The DN of this object is composed by its name (admin) plus the DNS domain of the LDAP server.
3) You can test the server executing the following command:
slapcat
Adding a New Directory Branch
1) Edit a file named base.ldif and add the following lines:
File: base.ldif
# create new
# change to your own suffix for the field 'dc=server,dc=world'
dn: ou=people,dc=uis,dc=edu,dc=co
objectClass: organizationalUnit
ou: people

dn: ou=groups,dc=uis,dc=edu,dc=co
objectClass: organizationalUnit
ou: groups
2) Add the objects using the following command:
ldapadd -x -D cn=admin,dc=uis,dc=edu,dc=co -W -f base.ldif


